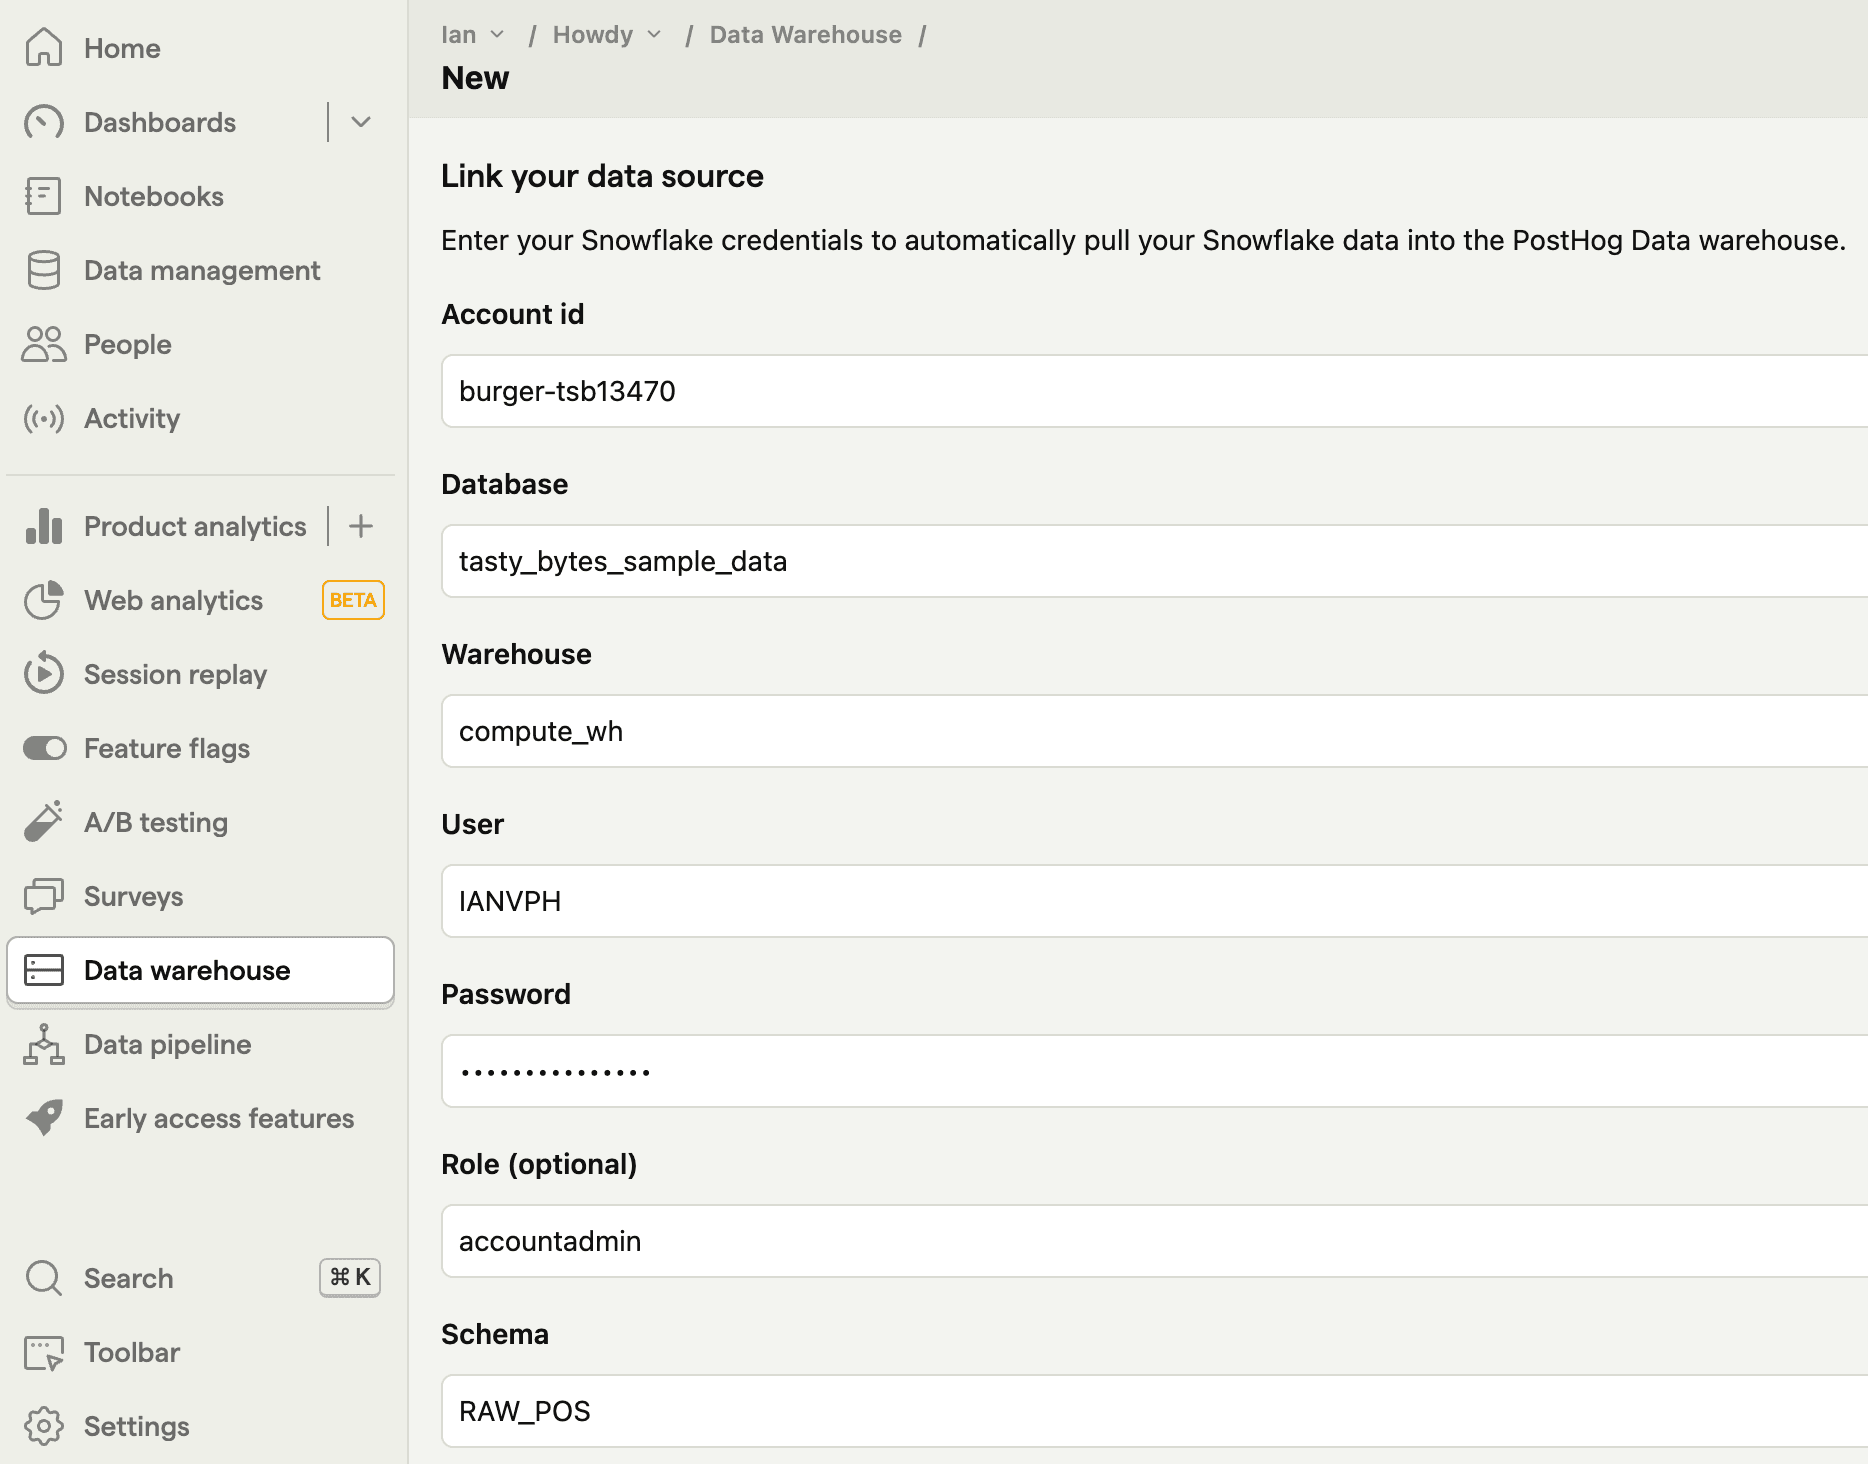
The data warehouse can link to data in Snowflake.
Start by going to the Data pipeline page and the sources tab and clicking New source. Choose Snowflake and enter the following data:
- Account identifier: Likely a combination of your organization and the name of the account (e.g.
myorg-account123). You can find this in the sidebar account selector or by executing theCURRENT_ACCOUNT_NAMEandCURRENT_ORGANIZATION_NAMEfunctions in SQL. - Database: Like
tasty_bytes_sample_data - Warehouse: Like
compute_wh - User: Your username like
IANVPH - Password: The password for your user
- Role (optional): The role with necessary privelges to access your context like
accountadmin. - Schema: The schema for your database like
RAW_POS. If it isn't working, trying using all caps. - Table Prefix: The optional prefix for your tables in PostHog. For example, if your table name ended up being
menu, a prefix ofsnow_prod_would create a table in PostHog calledsnow_prod_menu.
Once added, click Next, select the tables you want to sync, as well as the sync method, and then press Import.
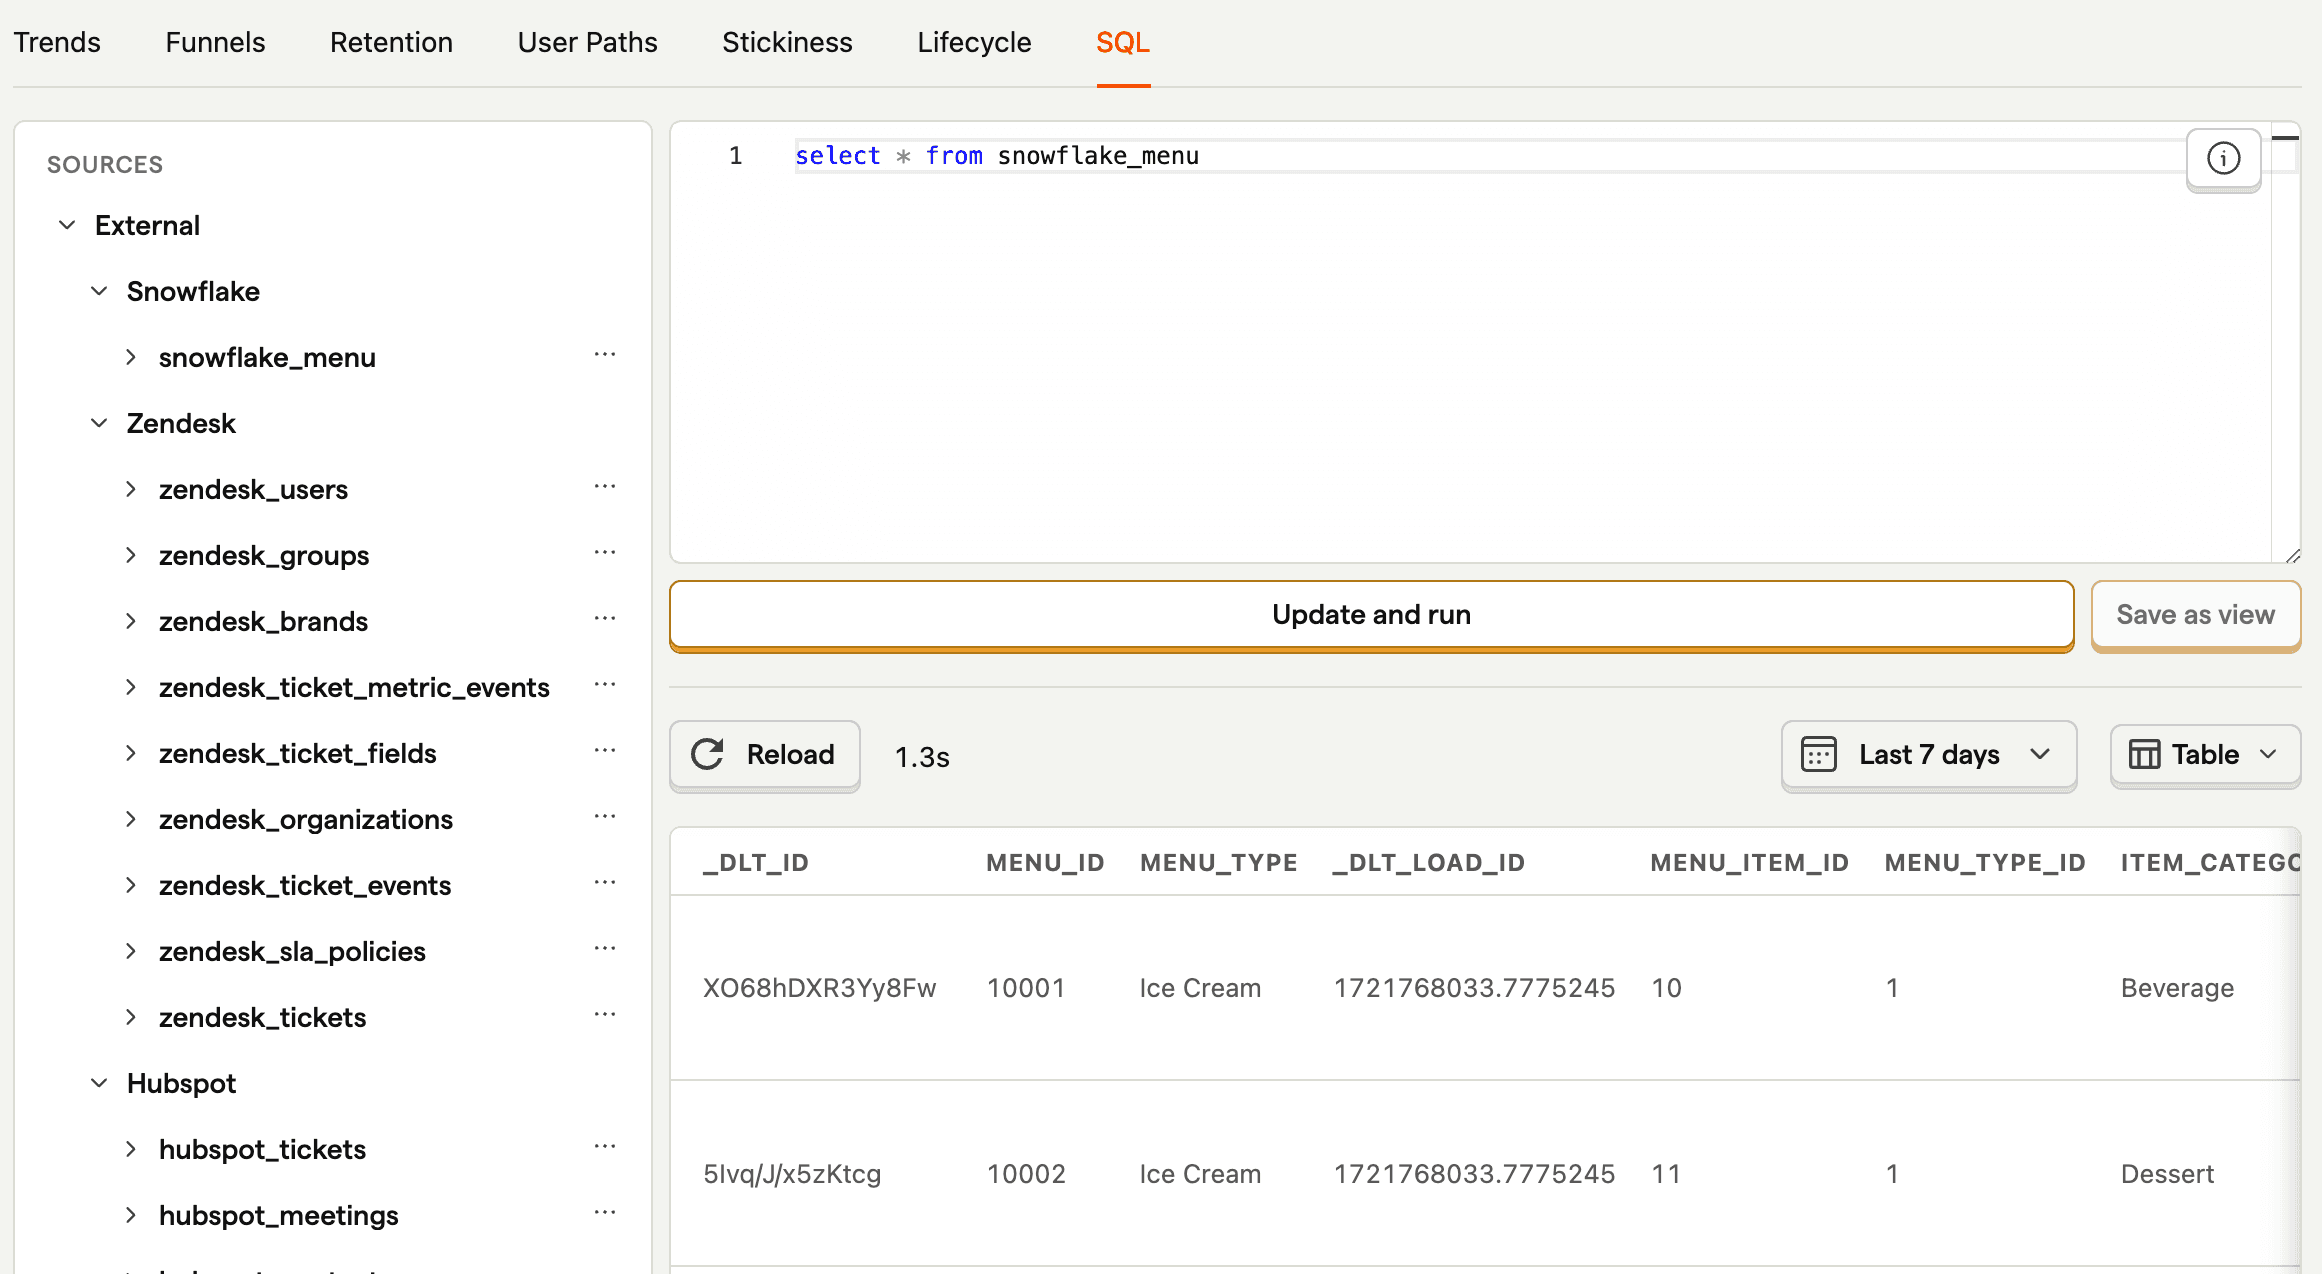
Once done, you can now query your new table using the table name.